Installing FreeBSD 15 and CTWM on a ThinkPad x61s, because why not ?
TL;DR : Everything works fine out of the box except backlight and HD resolution. The fix :
pkg install drm_kmod, enable itsysctl kld_list=i915msand setbacklight 100
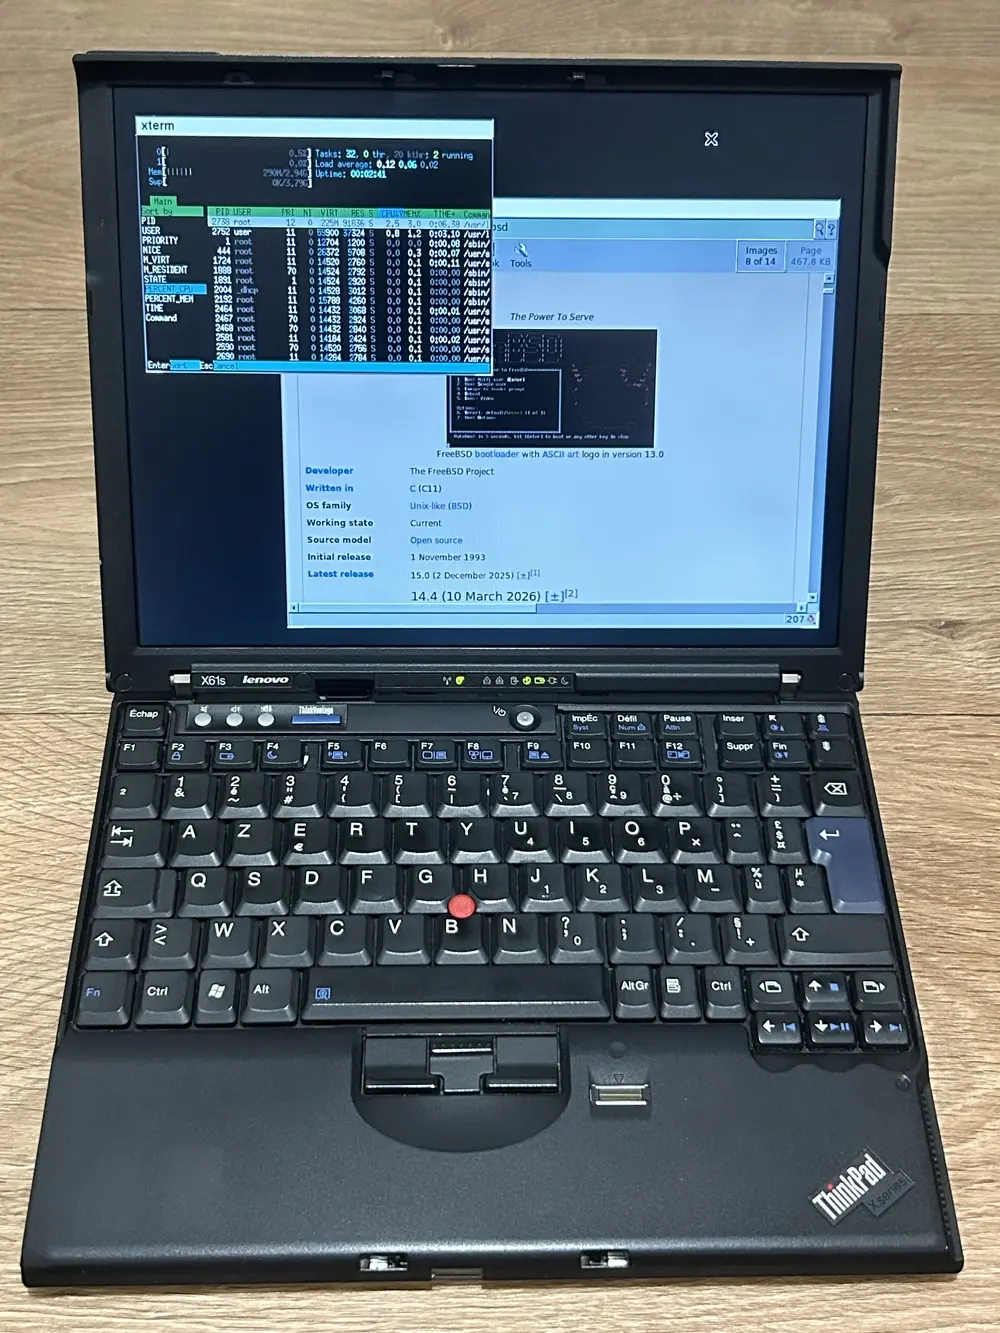
I had the opportunity to buy the famous ThinkPad x61s for just a few euros. I’ve owned many different ThinkPads because I find them well-built and particularly compatible with operating systems other than Windows. But I’ve never owned a model as old as this x61s.
Released in May 2007, it’s just under 20 years old. Many models would have given up the ghost by now, but not this behemoth, which, despite the transition to Lenovo, still carries its IBM DNA. Even though its reputation of tank, the weight of the years and a reputation for overheating had me a little skeptical. It’s the smallest model, with its Intel Core 2 Duo L7300 CPU @ 1.40 GHz and 3 GB of RAM … not exactly a powerhouse. And yet, it came with Windows 10 and turned out to be surprisingly fast and cool … until I opened a 1080p YouTube video, at which point it nearly took off like a helicopter because the fan was spinning so fast. Final note for the awesome 3/2 ratio, yet the screen quality is far from modern standards.
#The installation
The Intel Core 2 Duo L7300 is one of the first 64-bit CPUs for the consumer market. Great, FreeBSD seems to have dropped 32-bit support in its latest version, 15. After downloading an AMD64 ISO and copying it to a bootable USB drive, I immediately configured the BIOS to set the USB port as the boot priority. I was expecting a complicated installation, but not at all. Yes, the interface is a far cry from Ubuntu, but everything is very easy to do.
- First, select the “Distribution Sets” installation type to select the minimum options and remove
kernel-dbgandlib32components. - Set up the network. I had read a few tutorials beforehand that explained the post-installation method using
/etc/wpa_supplicant.conf. But that wasn’t the case at all, everything is done within the installation interface, including scanning for networks, selecting theSSID, and entering theWEPkey. Everything worked perfectly the first time. - Select the
UNIXfile system.UFSis lightweight and uses fewer system resources than more advanced file systems likeZFS. Since the x31s has limited RAM and CPU power,UFShelps keep the system faster, more stable, and easier to manage. I don’t need the advanced features ofZFS. Use the entire disk since the machine will be dedicated to this purpose, and choose theGPTpartition scheme (which replacesMBRI wasn’t able to test this for the exercise). - The
rootuser is created by default; all that’s left is to set a password. - After going through a few steps to select the HTTP mirror, choose the keyboard layout, and set the date and time, I’m prompted to add a few components. I select
powerdfor CPU frequency scaling andmousedto start the mouse driver. - I’m adding a user and adding it to the group
wheel.
#The optimization
Right out of the box, FreeBSD on my x61s required very little tweaking :
- I limit the power consumption of the Wi-Fi chip (which is known to be a power hog) :
vi /etc/system.confand setdev.iwm.0.twpower = 50. - Since powerd was set on during the install, I set configure the CPU with high speed when AC on and power-save on battery :
vi /etc/rc.confand setpowerd_flags="-a hiadaptive -b adaptive". - A very obvious system update
freebsd-update fetch installand the same for packagespkg updateandpkg upgrade. - The backlight was very low and the resolution was limited to 800x600. So I installed the Direct Rendering Manager GPU driver
pkg install drm_kmodand enable itsysctl kld_list=i915ms, after a reboot, the HD resolution was on and a simplebacklight 100was enough to set a full screen brightness (yet quit low but never mind).
#Claude’s Tab Window Manager
CTWM is a very light window manager and yet very configurable. When idle, it uses almost no RAM or CPU. It’s even easier to install :
- First, I installed the graphical environment components: the
XorgX server along with the lightweight window manager CTWM using:pkg install xorg ctwm - Then, using the regular (non-root) user account I created during installation, I set up a
~/.xinitrcfile to tell X what session to start. For now, I kept it very simple:exec ctwm & - After that, I launched the graphical session with:
startx - And … yeah, the default CTWM look is pretty rough, very retro in the not immediately lovable sense. So I decided to customize it by creating a
~/.ctwmrcconfiguration file with my own settings.You can find some themes in the officiel site.
#Final words
The screen’s 3/2 aspect ratio is great, and everything works almost out of the box with FreeBSD. The machine is fast, quiet, and stays cool. The keyboard is high-quality, a nice change from the ultra-flat keys on a MacBook. I hope to achieve my goals with this setup. See you in a few weeks to talk more about it.